Create Network Interface(s)
For the virtual VCE in Azure, GE1 will be WAN (overlay enabled) and GE2 will be LAN (overlay disabled). In the Azure side, that means the first interface is WAN (subnet can access Internet), and the second interface is LAN (the interface accept traffic from other client/server located in the VNET)
Since the manual deployment is not using a template, the VM initially will only have a single NIC and the setting of that NIC is not what we need. As a result, here will manually create the two NICs and they will be associated to the VM (the virtual VCE) later.
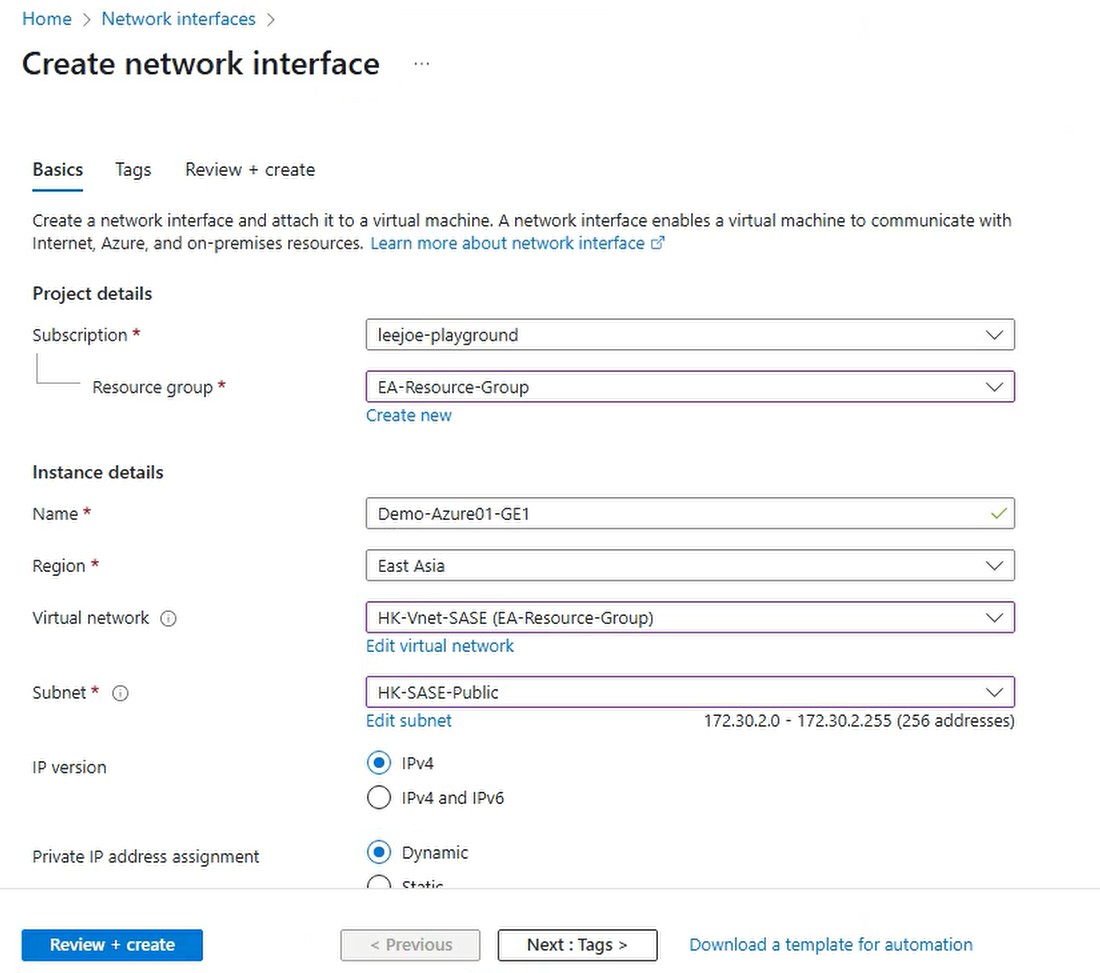
Firstly, let’s create the GE1 (WAN). Go to Network Interface, give it a name “Demo-Azure01-GE1”, select the Region and Subnet match your environment. For the IP address assignment, since this is WAN side, dynamic is fine.
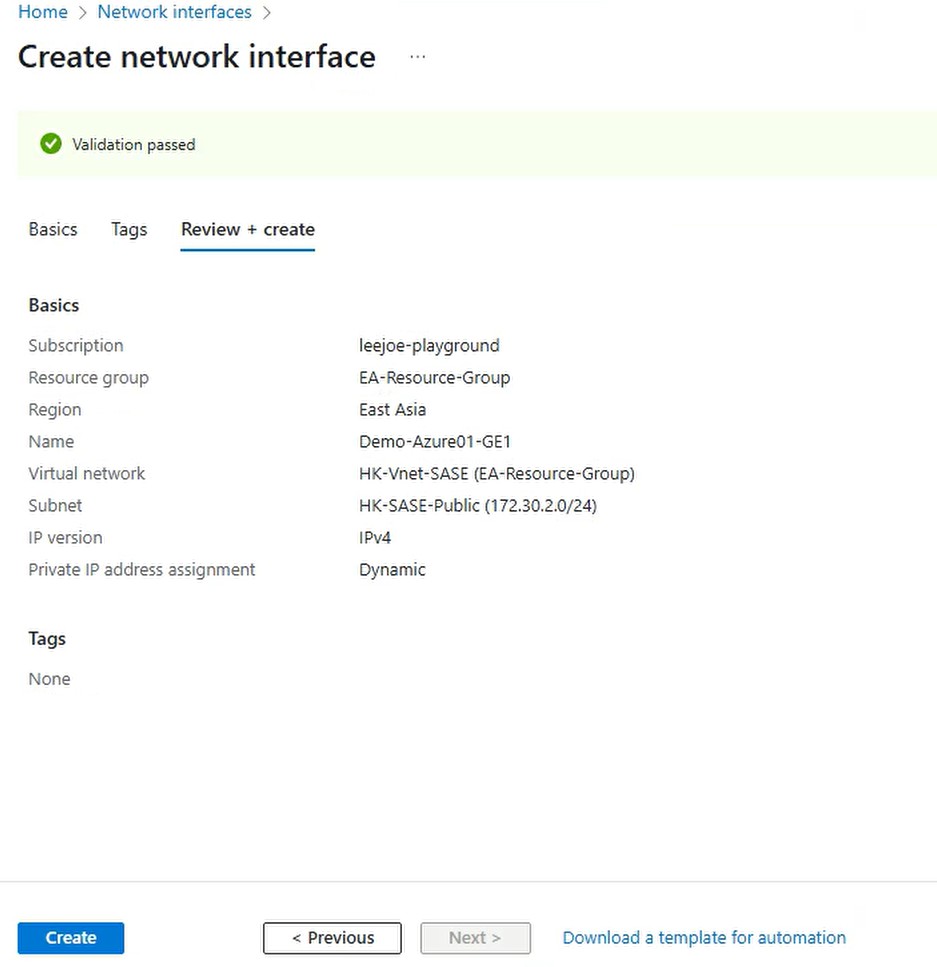
After click “Review + create” and with Validation passed, click “Create”:
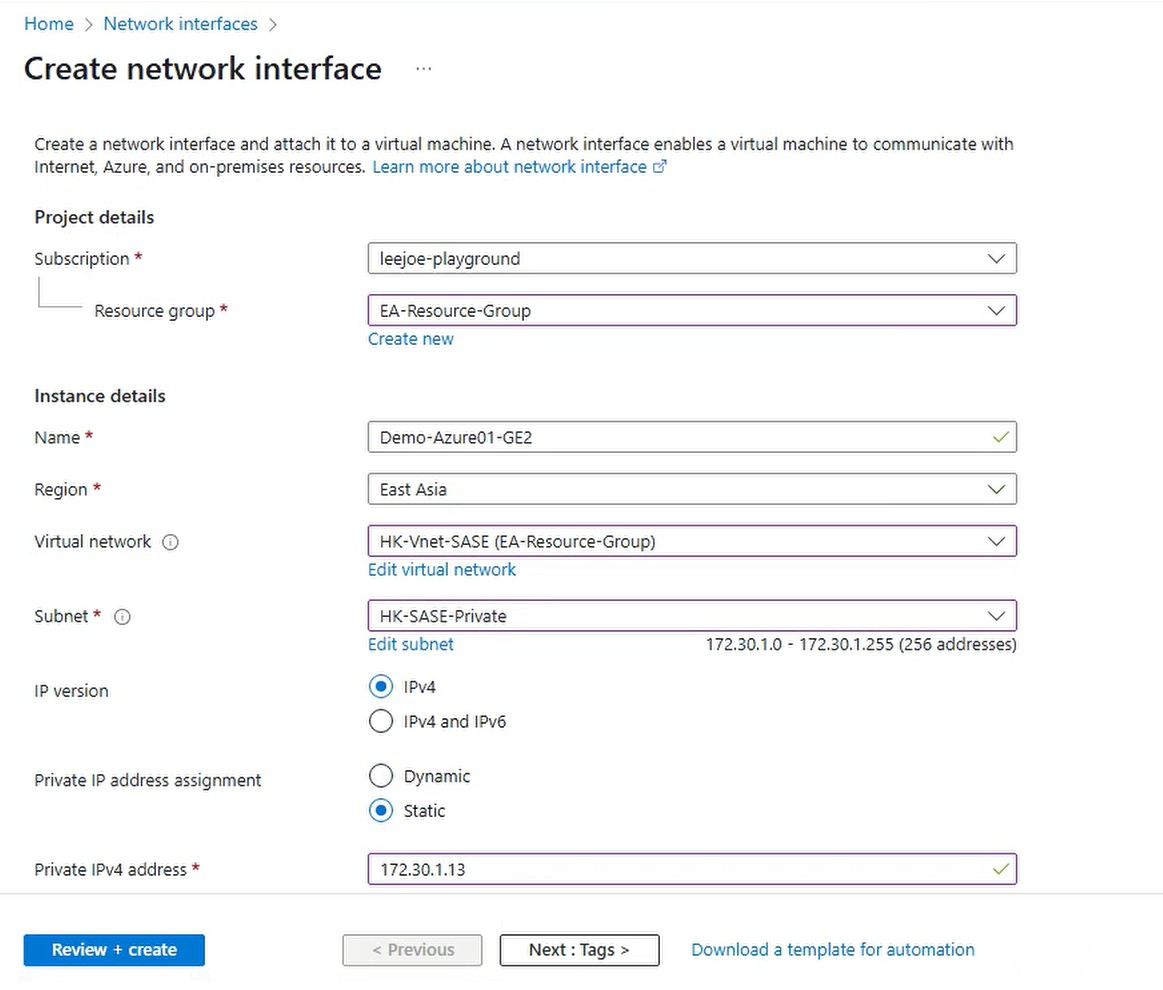
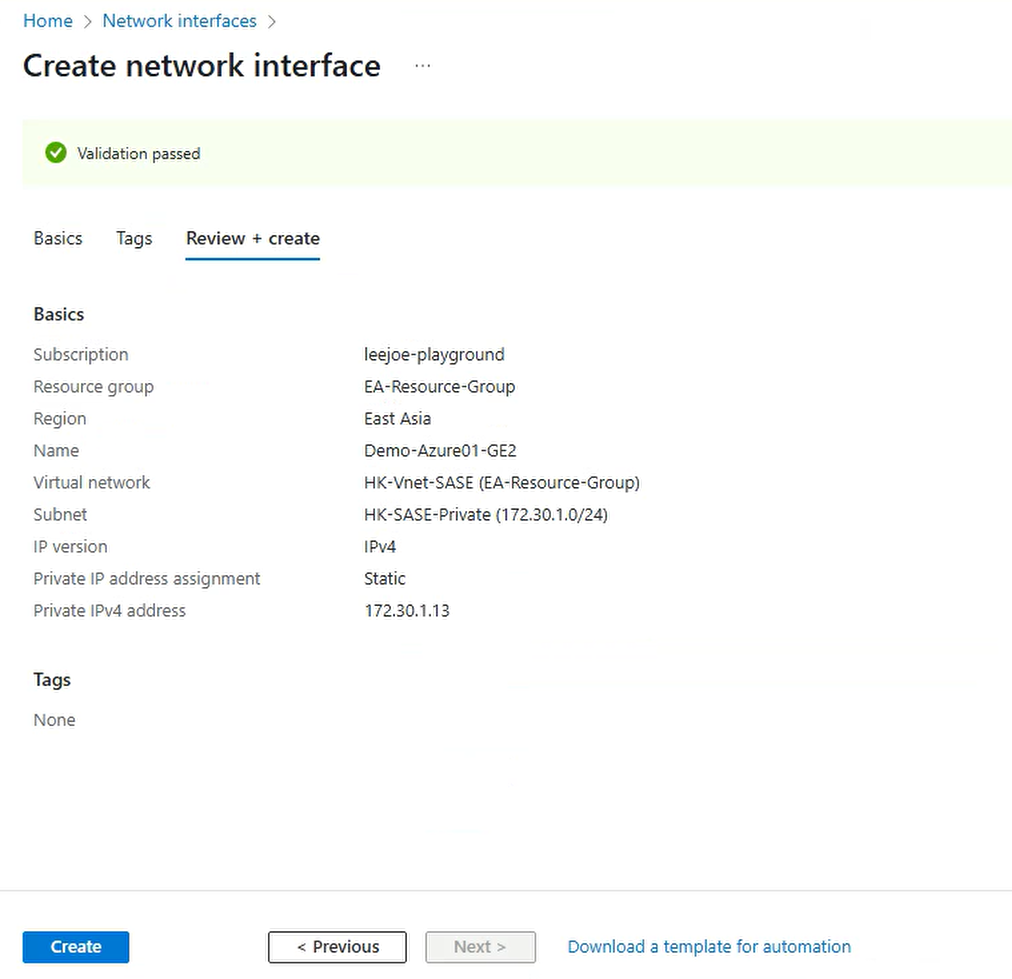
Secondly, create the GE2 (LAN). Give the interface name “Demo-Azure01-GE2”, for the private IPv4 address, it is recommended to use a static IP because this will be the default gateway of the route table which accept the traffic to go through SD-WAN. In this article, the NIC “Demo-Azure01-GE2” will be using 172.30.1.13 as the IP address. Let’s see the screen capture:
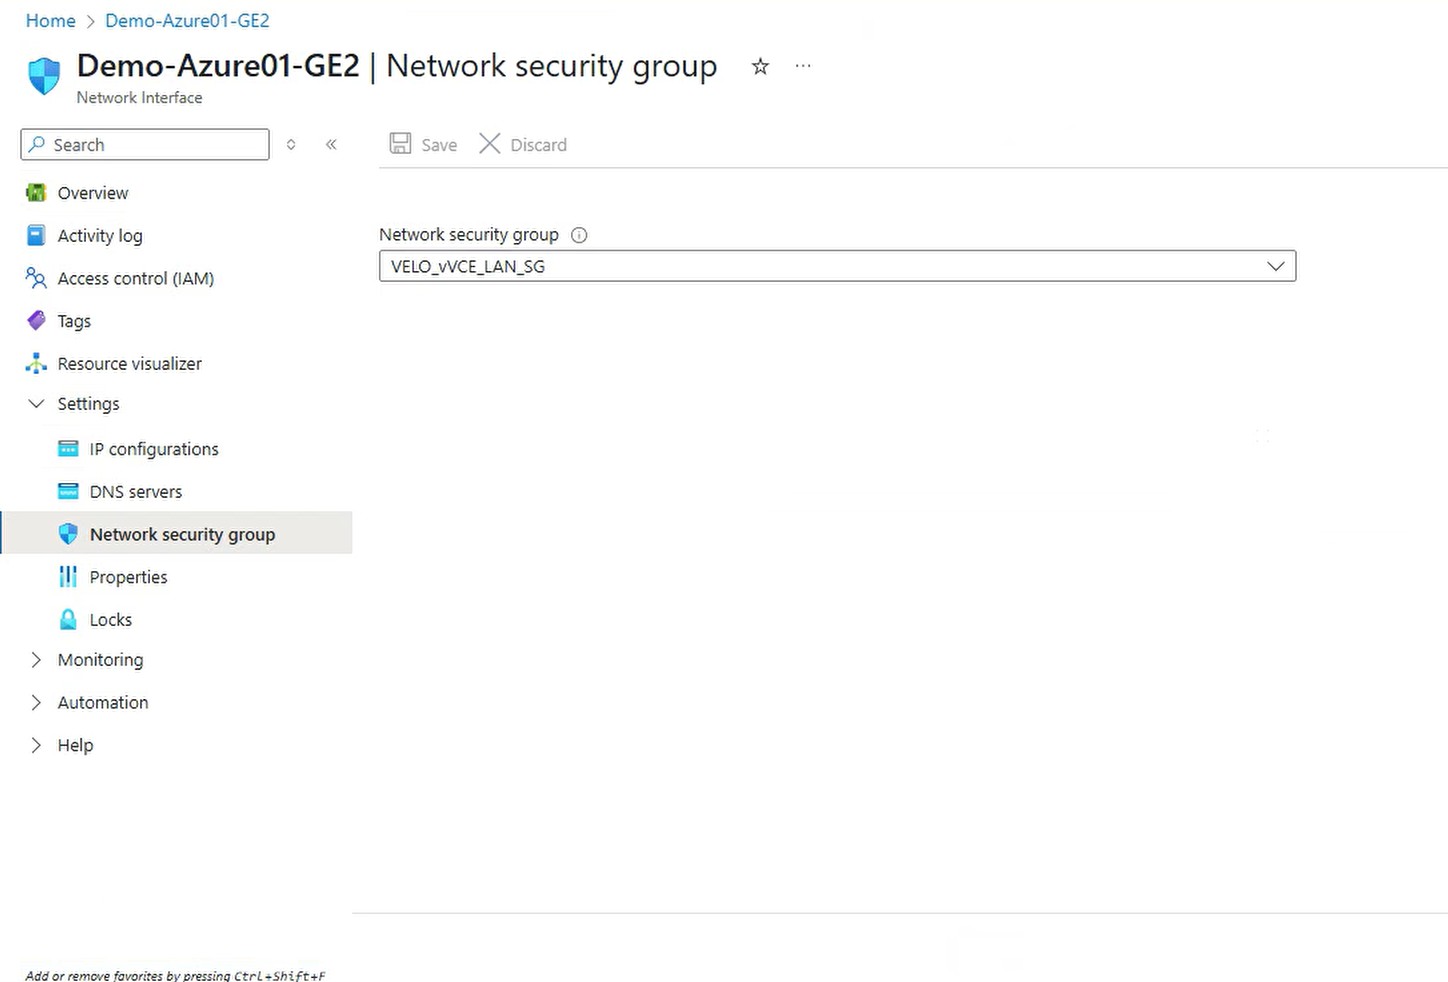
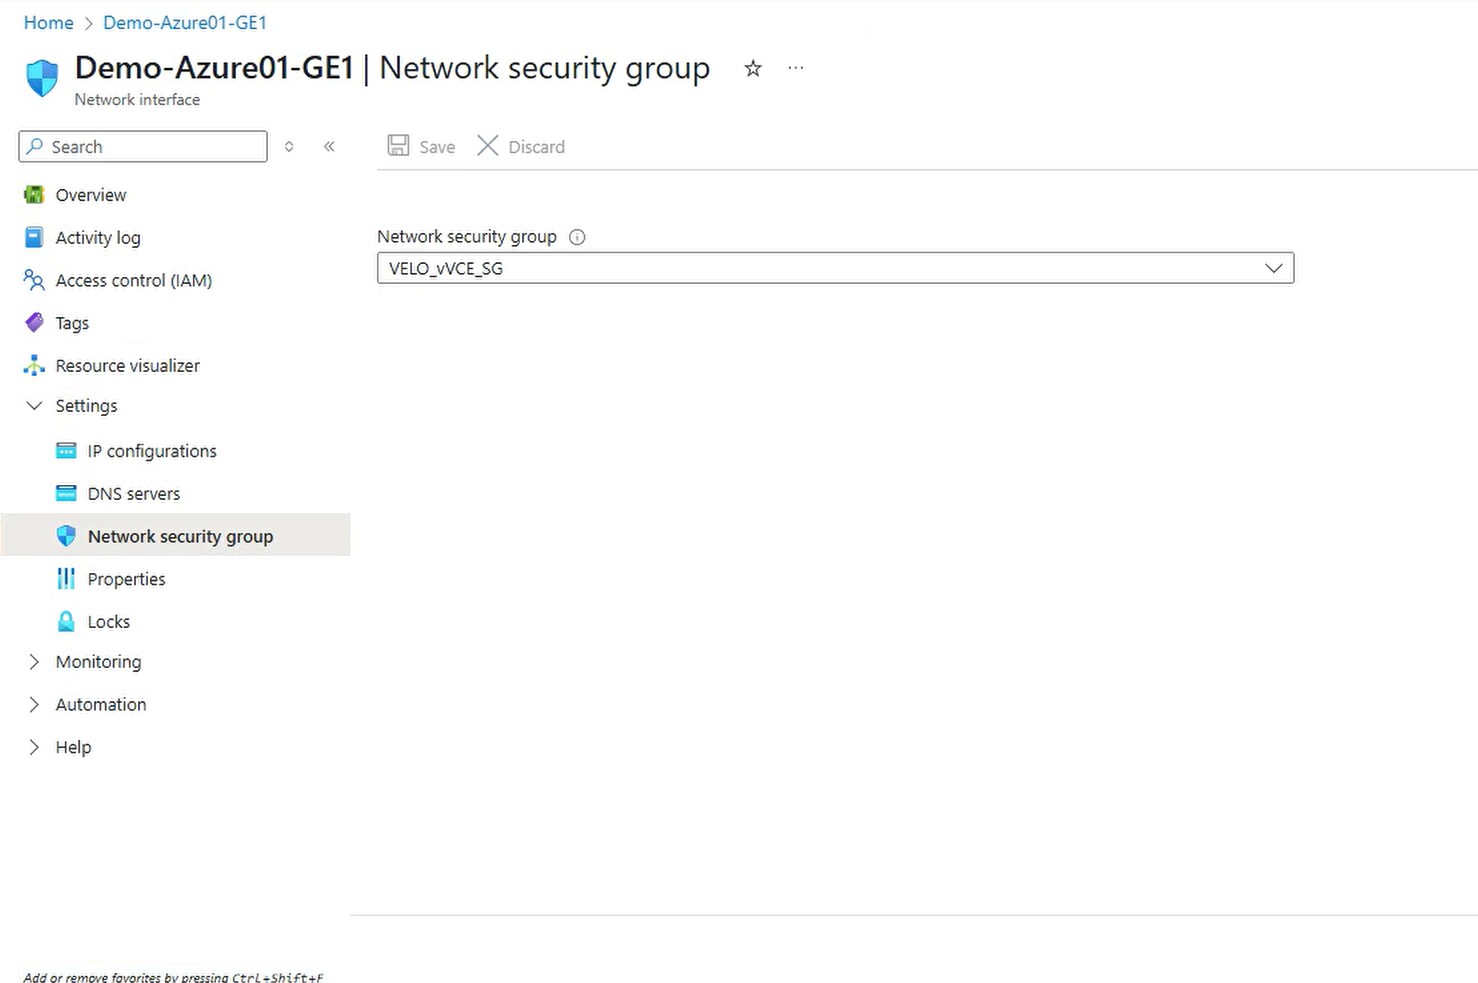
Assign the Network Security Group to the NIC
Assign the corresponding Network Security Group to the NIC. For Demo-Azure01-GE1 (WAN side), assign “VELO_vVCE_SG”
For Demo-Azure02-GE2 (LAN side) , assign “VELO_vVCE_LAN_SG”: